Well, even the Pixel 3A, to this date, is considered by many as the device with the best overall offering. Add to the fact that these devices have the best software on any Android smartphones, and it more brownie points to its name. Furthermore, you wouldn’t see the 48,64 or 108MP camera or quad rear camera setup in the Google devices. The reason is simple- megapixels aren’t the sole yardstick for measuring the camera quality. Even the 10-12MP camera of Pixel could easily outlast the 48 and 64MP cameras of other devices. However, all these are just the beginning. You could add much more to your device if you step into the custom development. These include flashing custom ROMs, custom recoveries like TWRP or LineageOS recovery, or gaining system-level privileges. The latter, in simpler terms, is also known as rooting your device. And as opposed to the earlier notion, rooting is no longer limited to the tech geeks (refer to our survey for surprising results: Rooting Poll: Is it Worth the Risk? You Decide and let us know). So on that note, here are the detailed instructions steps to root Pixel 3a, Pixel 3a XL, Pixel 3, Pixel 3 XL running the latest Android 11, without using TWRP Recovery.
[GUIDE] Flash ROMs/Magisk/TWRP/Kernels on A/B Partition DevicesHow to Flash Various Files in A/B Partition DevicesInstall Custom ROMs on any Android Device- Includes A/B PartitionHow to Fix FAILED (remote: unknown command) Error
How to Root Pixel 3a, 3a XL, 3 & 3 XL running Android 11 without TWRP
Before we begin with the instructions steps, there are a few requirements that you need to meet. Please go through the prerequisites section and make sure you checkmark all the necessities. Droidwin and its members wouldn’t be held responsible in case of a thermonuclear war, your alarm doesn’t wake you up, or if anything happens to your device and data by performing the below steps.
Prerequisites
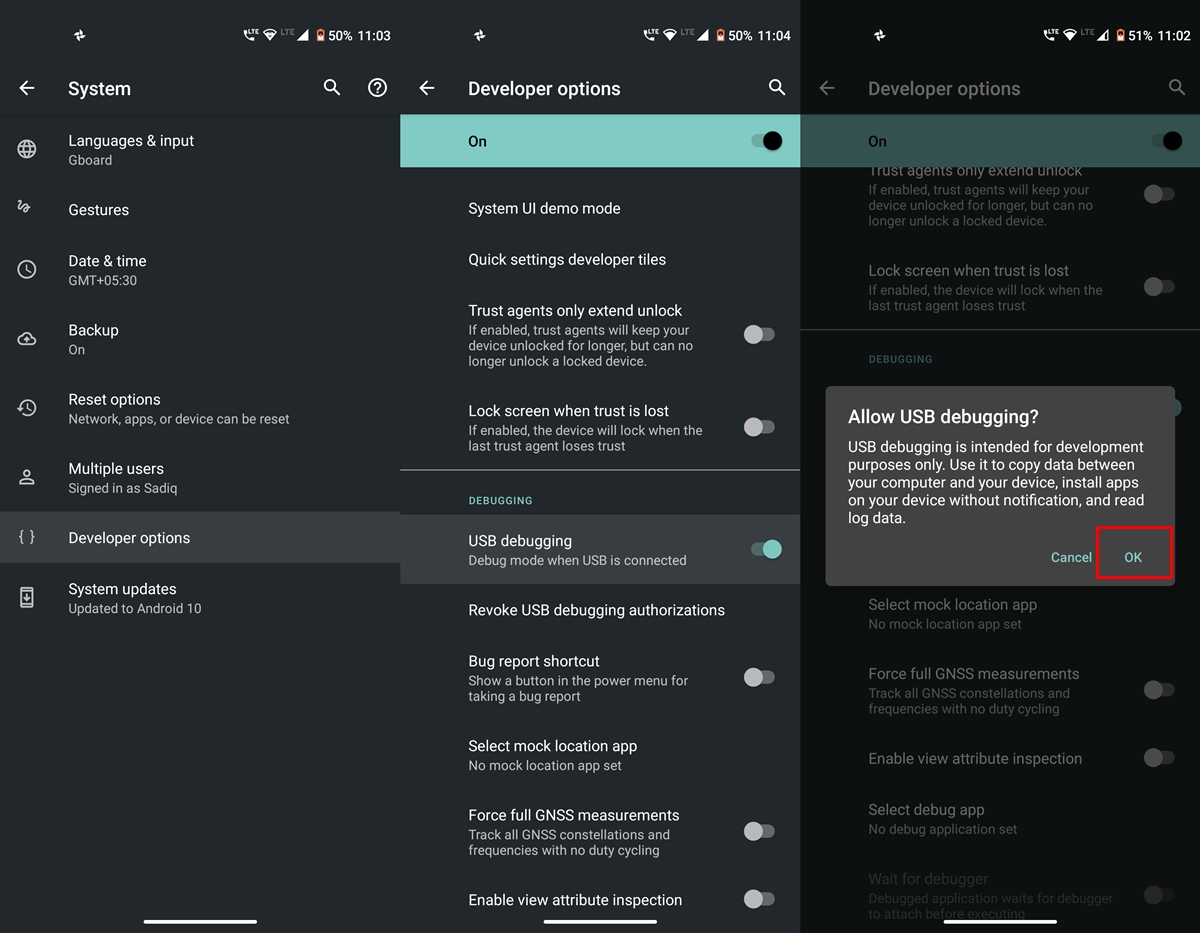
First and foremost, you need to unlock the device’s bootloader. If you haven’t done, then refer to our detailed guide on How to Unlock Bootloader Of Google Pixel DevicesNext up you will also have to enable USB Debugging. This will be needed to boot the device to Fastboot Mode. So head over to Settings > About Phone > Tap on Build Number 7 times > Go back to Settings > System > Advanced > Developer Options > Enable USB Debugging. [Don’t Miss: Enable USB Debugging on a Broken Android Device’s Screen? Here’s a Workaround]. You will also have to install the Android SDK Platform Tools. This will provide the necessary ADB and Fastboot binaries.Finally, download the latest Magisk Manager v 8.0.2. You don’t need to download the Magisk ZIP File, only the Magisk Manager APK is required.
That’s it. These were all the required files. You may now proceed with the steps to root Pixel 3a, Pixel 3a XL, Pixel 3, Pixel 3 XL running the latest Android 11.
STEP 1: Extract Stock boot.img
To begin with, download the stock boot.img file corresponding to the firmware version installed on your Pixel device. For that, download the stock firmware for your Pixel device from Google’s website. If you are going to download the OTA package then upon extraction you will find the payload.bin file. In that case, refer to our guide on How to Extract payload.bin and get the stock boot image file.
On the other hand, if you download the factory image, then you will find a couple of files, including a zipped image file. You will have to decompress that file and there you will find the stock boot image file.
How to Disable DM-Verity or Android Verified Boot without TWRP.Everything About Magisk- Manager, Modules and MoreBest Magisk Modules of 2020 [PART-1]Patch Stock Boot Image via Magisk and Flash it using Fastboot
STEP 2: Patch Stock Boot.img file
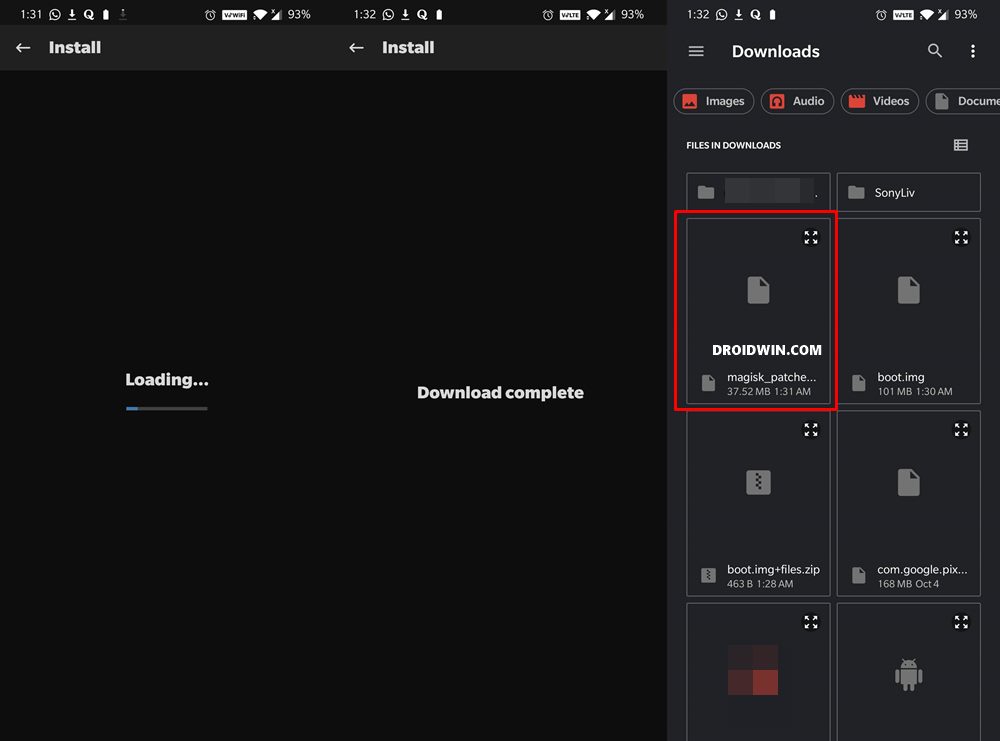
UPDATE 1: Quite a few Android 11 users are facing issues while patching the stock boot.img file via Magisk manager. Well, I have found the fix to this issue, please refer to our detailed guide on the same: Fix Magisk patched boot.img issue while Rooting Android 11. If you wish to save a click, then here’s the explanation in short: You have to install the Magisk Canary build instead of the stable and then change the update channel to Canary from within the app itself. Once you have done the said change, you may then proceed with the below steps to patch the stock boot image file using Magisk and flash it via Fastboot commands to root Pixel 3a, Pixel 3a XL, Pixel 3, Pixel 3 XL running Android 11.
STEP 3: Flash Patched Boot.img file via Fastboot
In this third and final section to root Pixel 3a, Pixel 3a XL, Pixel 3, Pixel 3 XL running Android 11, we will be flashing the patched boot.img via Fastboot Commands. Follow along. That’s it. With this, we conclude the guide on how to root Pixel 3a, Pixel 3a XL, Pixel 3, Pixel 3 XL, running the latest Android 11, without using TWRP. If you have any queries, do let us know in the comments section below We will get back to you with a solution as soon as possible.
Fix TWRP Error 7 (While Flashing Custom ROM via TWRP)How to Fix FAILED (remote: unknown command) ErrorHow to Permanently Install TWRP without TWRP ZIP File (only using TWRP.img file)Root Android Devices Without TWRP Recovery
About Chief Editor

![]()
![]()
![]()

